
The world of science is filled with exciting experiments, and one of the most intriguing ones is creating a fruit battery. It’s a hands-on project that not only demonstrates the generation of electricity but also highlights the potential of everyday materials. In this blog, we will explore the materials you need to embark on this electrifying journey and dive into the science behind it.
The science behind the fruit battery
Now that we have our materials ready let’s delve into the science behind the fruit battery experiment. The magic happens through a process called electrochemical reaction, where chemical energy is converted into electrical energy. Here’s a simplified step-by-step explanation:
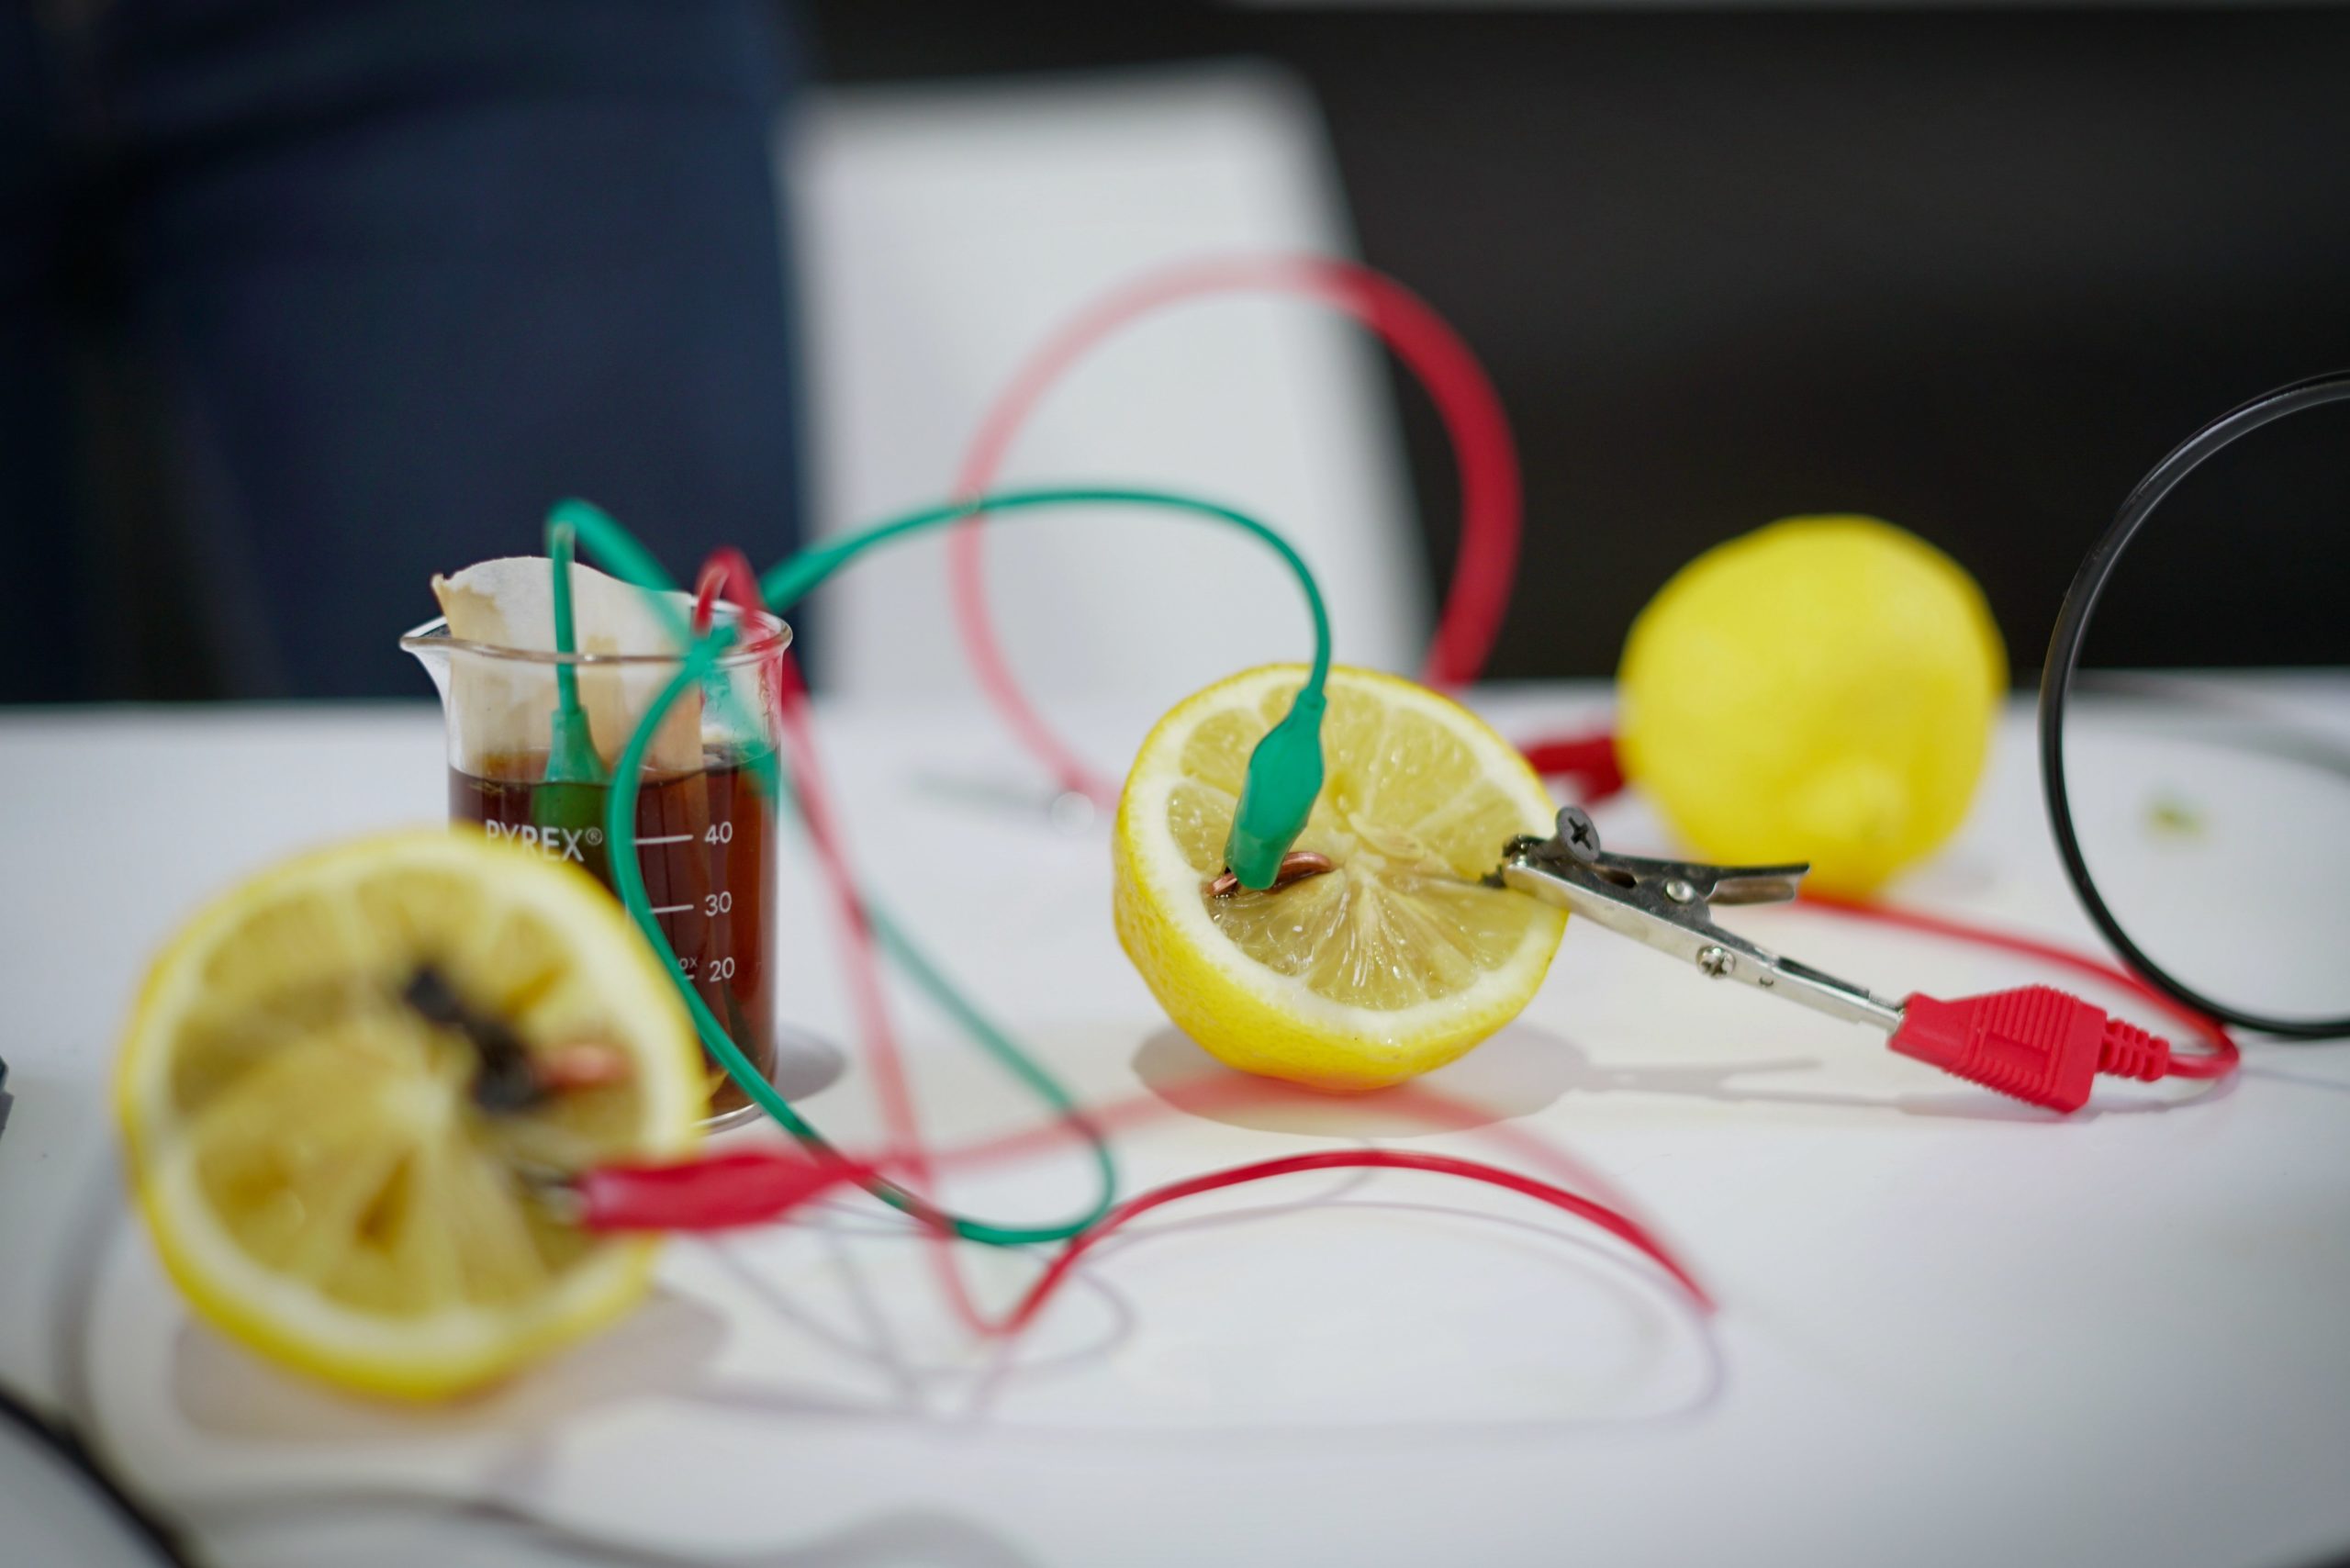
- Preparation: Start by gathering your chosen fruit (e.g., a lemon), a copper wire, and a galvanized nail (zinc). These will serve as your electrodes. Insert the copper wire and the zinc nail into the fruit, making sure they are not in direct contact with each other.
- Chemical reactions: As soon as you insert the electrodes into the fruit, chemical reactions begin. The zinc undergoes oxidation, releasing electrons and becoming zinc ions. These electrons flow through the wire to reach the copper electrode, where reduction occurs. This transfer of electrons creates an electric current.
- Completing the circuit: To utilize the generated electrical energy, connect the free ends of the copper wire and zinc nail to an electrical device or load. This could be a small LED light, a digital clock, or even a buzzer. When the circuit is complete, the electrical current powers the device.
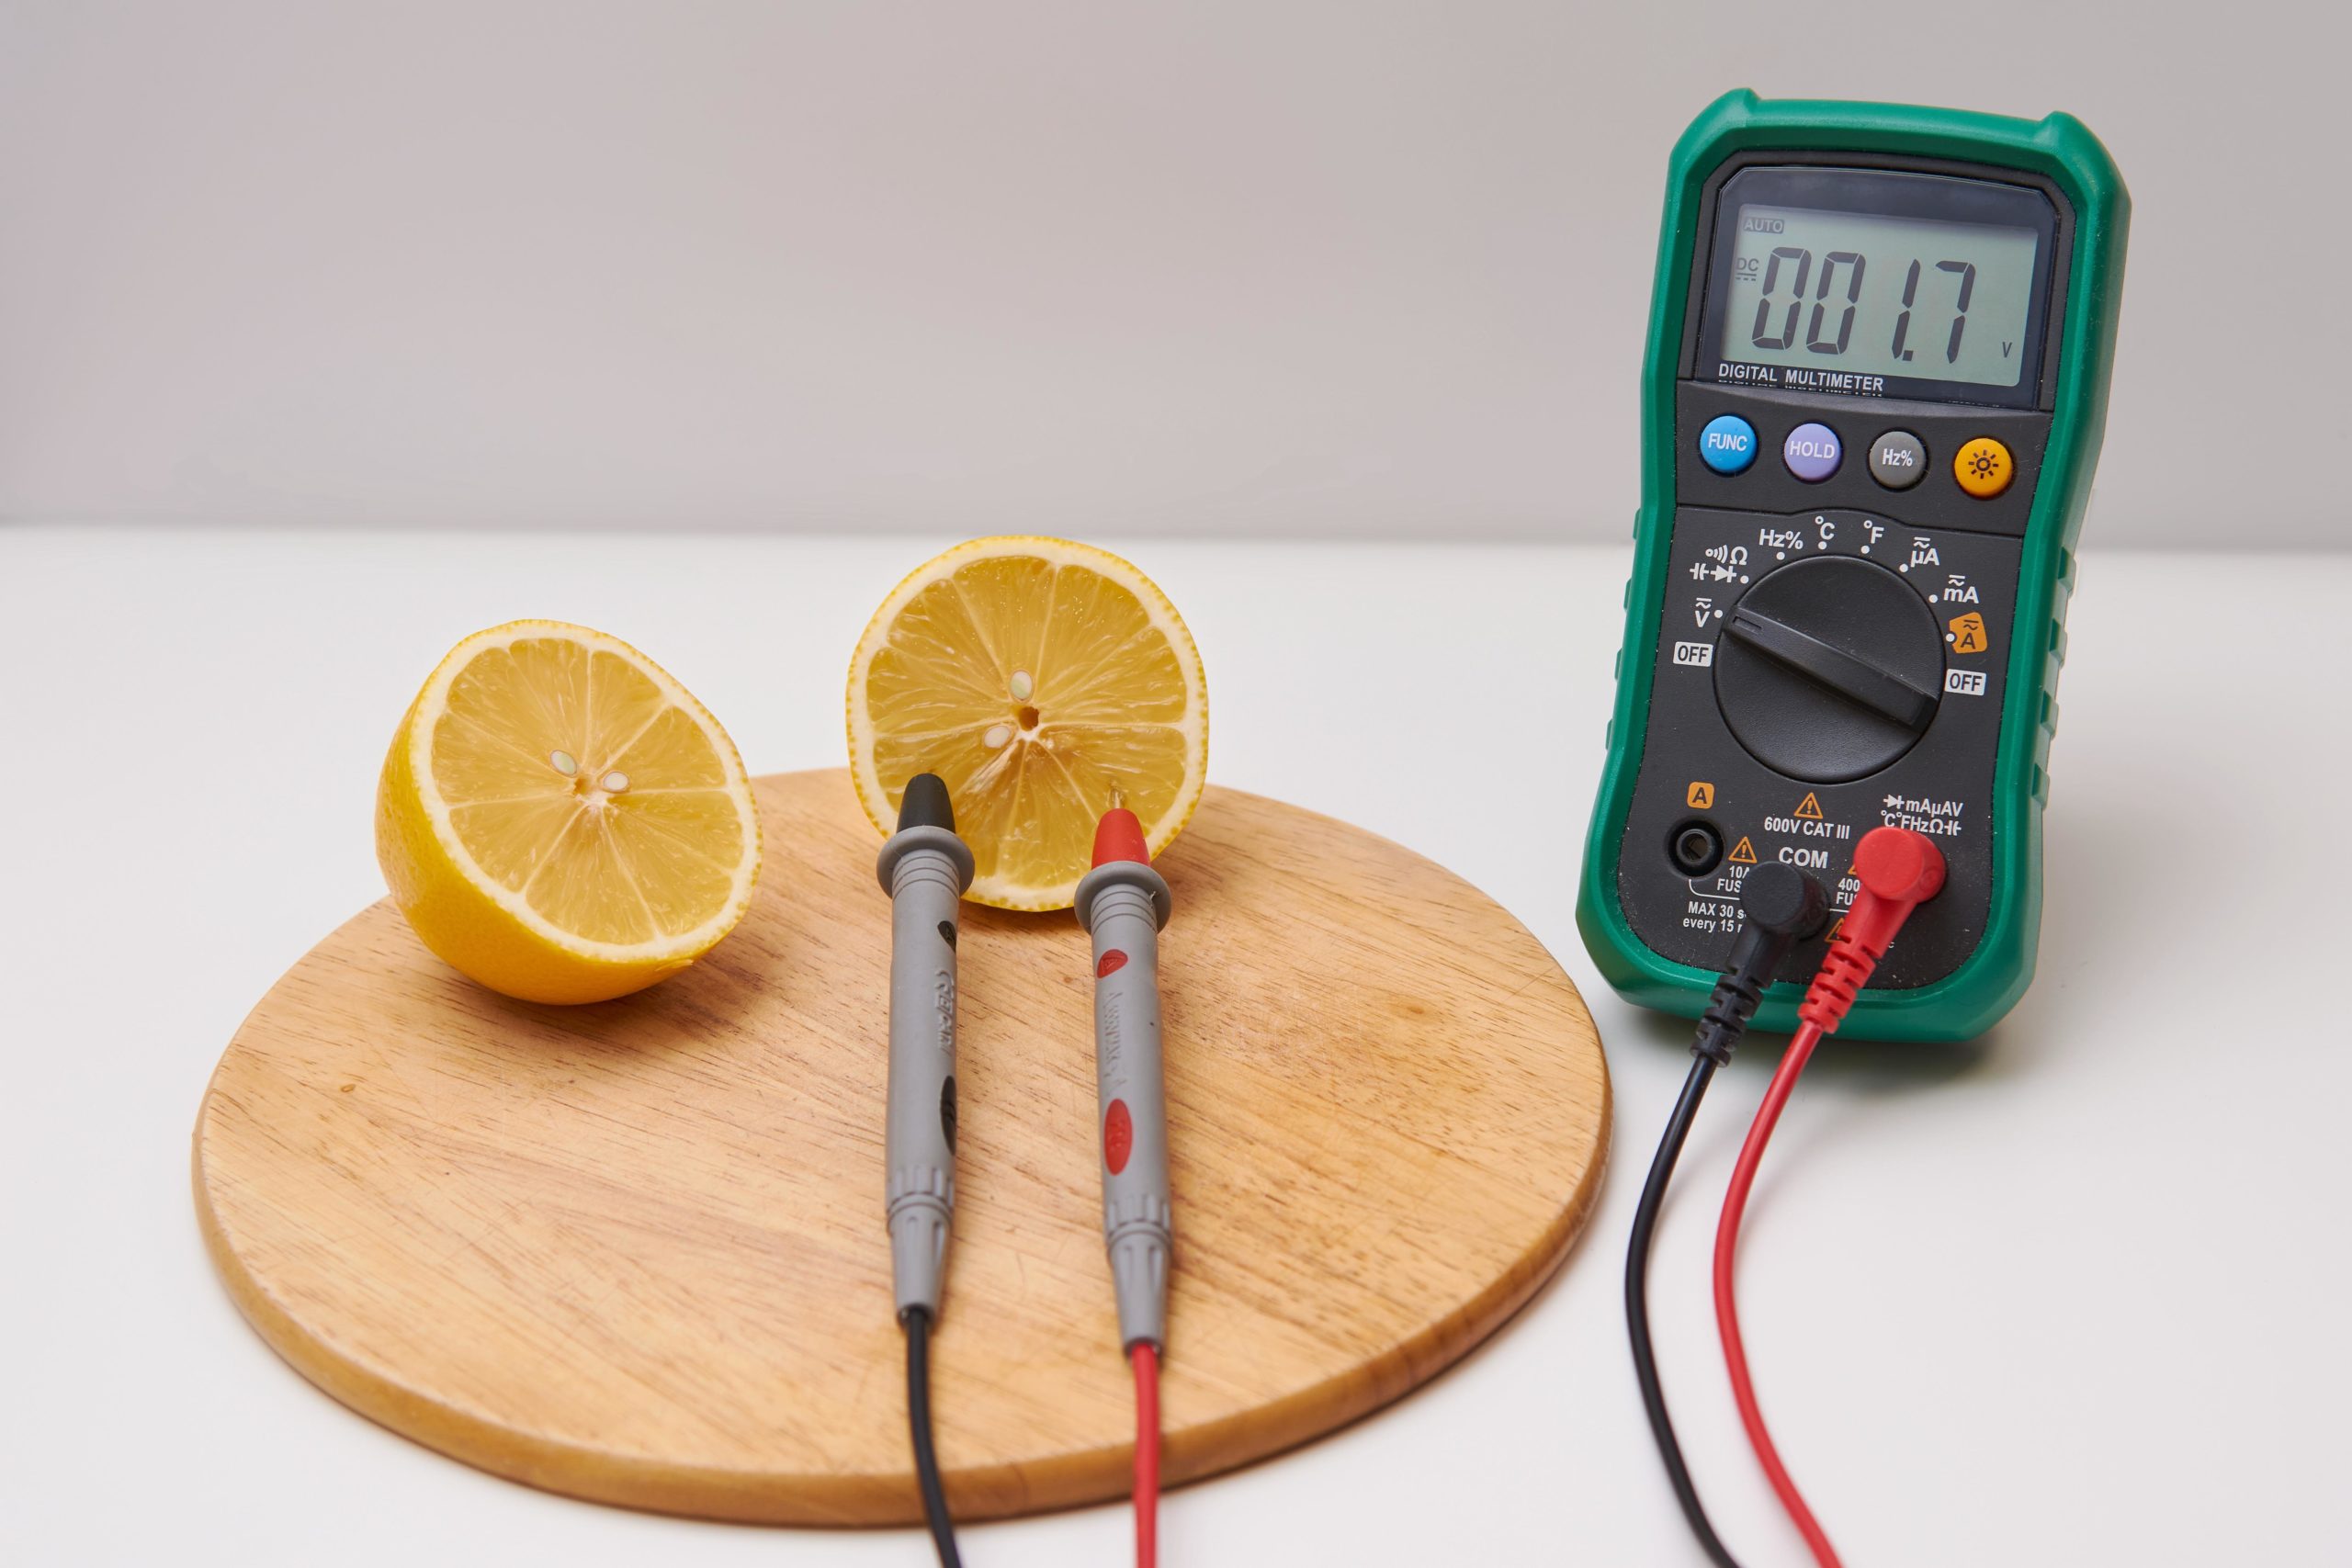
- Observations: Use your multimeter to measure the voltage produced by the fruit battery. You’ll notice that the voltage may vary depending on factors like the type of fruit, the size of the electrodes, and the freshness of the fruit.
Experimenting with variables
The beauty of the fruit battery experiment lies in its versatility. You can conduct various experiments to better understand the factors that influence the electricity generated. Here are some variables to consider:
- Type of fruit: Experiment with different fruits and compare their electrical output. Which fruit generates the highest voltage?
- Electrode size: Try using larger or smaller electrodes. How does electrode size impact the voltage produced?
- Multiple cells: Create multiple fruit cells and connect them in series (positive to negative). Does this increase the overall voltage?
- Temperature: Test the effect of temperature on your fruit battery. Does heating or cooling the fruit change the electrical output?

The concept of fruit batteries a tool for children education
The concept of fruit and vegetable batteries as a tool for teaching electricity in an engaging and informative way has been explored in various educational contexts. An article in “Primary Science” (January 2022) discusses how these experiments provide an effective platform for scientific learning, especially for children in elementary education. The fruit-and-vegetable battery experiment is utilized to teach fundamental concepts of electricity and energy, with examples demonstrating how children can engage in scientific work and achieve naturally differentiated outcomes. This hands-on approach in teaching electricity through fruit batteries is not only informative but also engages children in a practical understanding of scientific principles.
The magic of fruit batteries
Creating a fruit battery is not only a fun and educational experiment but also a reminder of the incredible potential that lies in everyday materials. It showcases the basic principles of electrochemistry and electricity generation in a simple yet captivating way. So, grab your materials, choose your fruit, and embark on a journey to unlock the power of nature through the magic of fruit batteries. Happy experimenting!
What materials do you need for a fruit battery?
To get started with your fruit battery experiment, you’ll need the following materials:
Fresh fruits
The star of the show is, of course, the fruit itself. When it comes to choosing the right fruit, opt for those with high acidity levels. Citrus fruits like lemons and oranges are popular choices, but you can also experiment with apples or even potatoes. The acidic content in these fruits allows for the chemical reactions necessary to generate electricity.
Metal electrodes
Metal electrodes are crucial components of your fruit battery. You’ll need two different types of metal: copper and zinc. Copper is readily available in the form of copper wire, which you can easily find at a hardware store. For the zinc electrode, galvanized nails work well. These metals will act as conductors and participate in the electrochemical reactions that create the flow of electrons.
Connecting wires
Thin, insulated wires are essential for connecting the metal electrodes to each other and to your electrical load. These wires will complete the circuit, allowing the flow of electrons generated by the fruit battery. Ensure that the wires are long enough to reach from the electrodes to your electrical device or load.
Multimeter
A multimeter is a handy tool that allows you to measure the voltage produced by your fruit battery. It’s essential for understanding the electrical output of your experiment and observing how different variables can impact voltage. If you don’t have a multimeter, you can still create a fruit battery, but having one adds a scientific dimension to your experiment.
Crocodile clips
Crocodile clips are small clamps or clips with teeth that help secure the connecting wires to the metal electrodes. They ensure a stable and reliable connection between the wires and the electrodes, preventing them from slipping off during the experiment.
Are you now ready for more advanced technology behind batteries and their implementation in modern industry?
Check out the online battery training with the European Battery Business Club.
Five tracks give you continuous learning nuggets to master diverse fields of contemporary battery research and application.